


The Ditchburn Mk2R Music Maker 30 Part 2
Restorations.
PART 2: Karl Dawson’s MK2R Music Maker 30 Serial Number 2594
This
Machine
first
started
its
life
as
a
MK2
16
selection
78
RPM
machine,
at
some
point
after
1955
it
was
returned
to
the
Dock
Road
factory
in
Lytham
and
converted
to
a
30
play
45
RPM
machine,
the
original
mechanism
was
built
in
the
UK
under
license
from
the
USA
company
Wurlitzer,
but
the
30
Play
conversion
kit
was
designed
totally
by
Ditchburn,
as
far
as
we
know
Wurlitzer never made a 30 play 45 rpm mechanism.
As
mentioned
in
the
last
section
of
part
1,
I
decided
that
a
strip
down
was
required
as
a
lot
of
the
parts
were
coated
in
old
solidified grease and needed to be cleaned and lubricated.
First
i
started
with
the
credit
units
The
first
is
the
original
credit
unit
that
was
modified
a
credit
removal
coil
and
relays
this
unit
adds
1
credit
for
every
6d
inserted
and
every
time
a
record
is
selected
a
credit
is
removed.
this
unit
also
was
modified
with
relays to switch the motor run and the amplifier mute circuits. also additional capacitors had been fitted to de-bounce the coils.
All
the
capacitors
needed
replacing
as
they
were
old
type
electrolyte
caps
and
were
showing
signs
of
aging
and
failure,
also
the
relays
were
replaced
as
the
contacts
were
in
bad
in
a
bad
state,
you
can
see
that
the
back
relay
that
mutes
the
amp
between
plays
has
a
burnt
contact,
that
is
because
the
original
relays
were
not
rated
at
300vdc
and
the
Valve
HT
took
its
toll
over time.
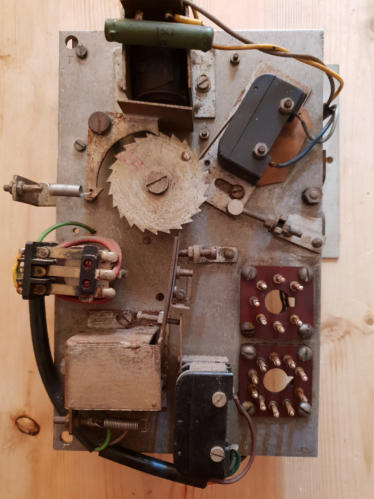
Add and Deduct a Credit Unit
Front
( before restoration )
Back
( before restoration )
Photo Ref: DB301 Courtesy of Karl Dawson.
Photo Ref: DB303 Courtesy of Karl Dawson.
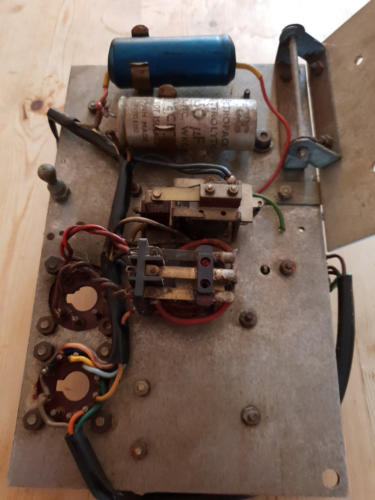
Front
( after restoration )
Back
( after restoration )
Photo Ref: DB302 Courtesy of Karl Dawson.
Photo Ref: DB304 Courtesy of Karl Dawson.
All
the
mechanical
parts
were
removed
and
cleaned,
the
star
wheel
was
lubricated
using
a
fine
Graphite
powder
do
not
use
oil
as
this
will
cause
dust
to
stick
to
the
shaft
and
will
prevent
the
wheel
free
running.
the
caps
were
replaced,
and
the
relays
were replaced with higher rated and sealed units.
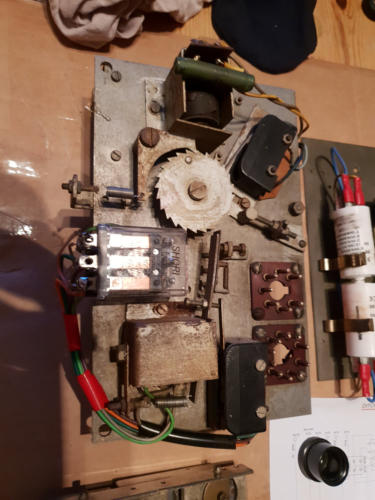
3 plays for 1 Shilling Unit
This
Unit
provides
3
pulses
to
the
credit
unit
above
on
insertion
of
a
shilling,
This
unit
took
a
bit
of
work
to
restore
it
uses
a
GPO
uni-selector
that
has
a
wiper
contact
that
moves
1
position
for
every
pulse
on
the
step
coil
and
on
insertion
of
a
shilling
it
will
step
across
the
25
positions
from
start
to
finish.
some
of
the
contacts
had
dirt
and
corrosion
on
them
so
it
took
a
bit
of
work
to
clean
them,
the
unit
uses
two
capacitors,
both
these
needed
replacing,
the
first
one
acts
as
storage
for
the
coil
and
the
second
capacitor
prevents
the
credit
coil
on
the
unit
above
from
dropping
out
as
it
steps
between
the
25
individual
contacts, these units fit onto the side of the cabinet.
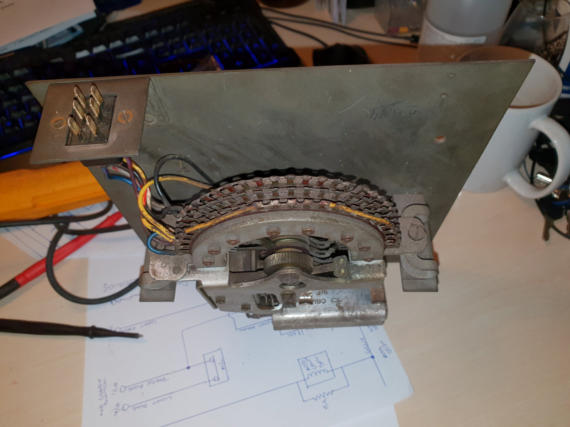
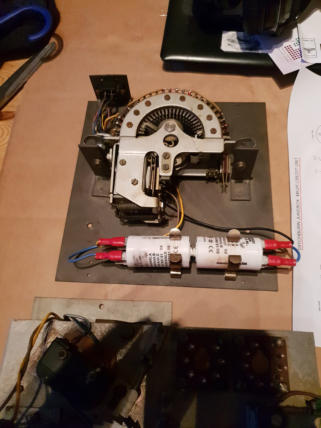
Photo Ref: DB305 Courtesy of Karl Dawson.
Photo Ref: DB306 Courtesy of Karl Dawson.
( before restoration )
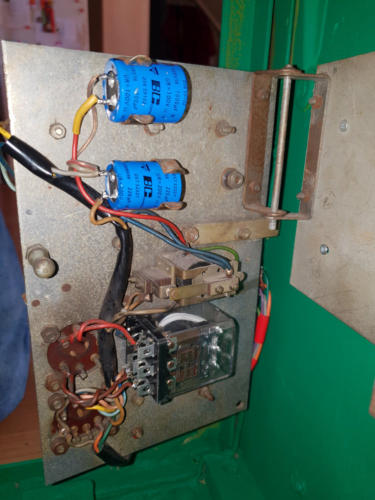
( after restoration )
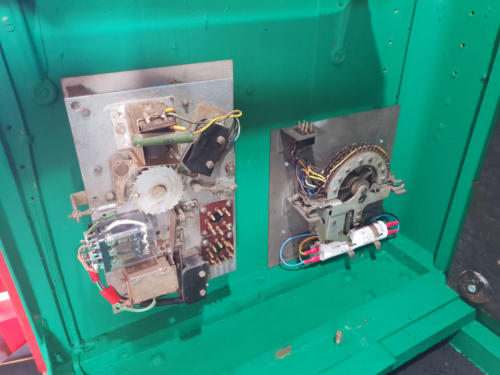
Photo Ref: DB307 Courtesy of Karl Dawson.
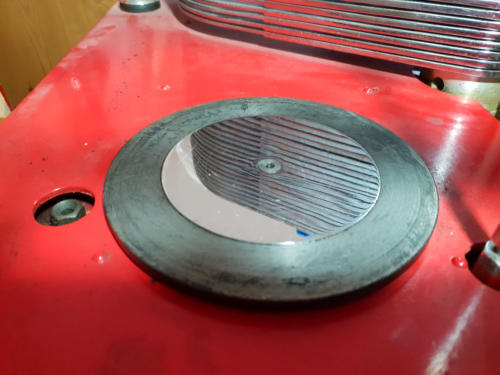
The Turntable
The
Rubber
turntable
mat
had
over
time
become
hard
and
brittle
and
lost
its
grippy
surface,
I
thought
it
was
going
to
be
difficult
to
find
a
replacement,
but
i
noticed
that
the
Ami
R84
mat
was
very
similar
and
thought
it
may
need
some
trimming
to
fit
but
when
it
arrived
i
found
it
was
identical
in
size
to
the
original,
but
the
bottom
had
fixing
protrusions,
so
it
was
a
simple
process
of
slicing
these
off
flush
with
the
surface
and
gluing
the
mat
to
the
turntable,
i
cleaned
the
platter
and
hub
chrome
with
metal polish and it was as good as new.

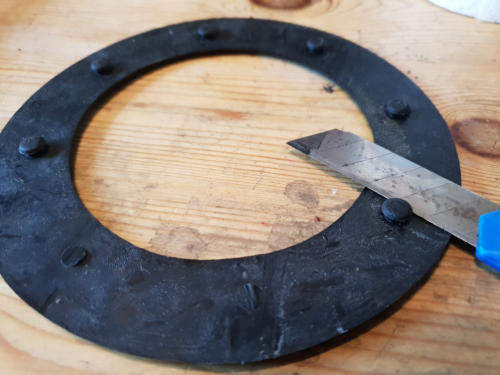
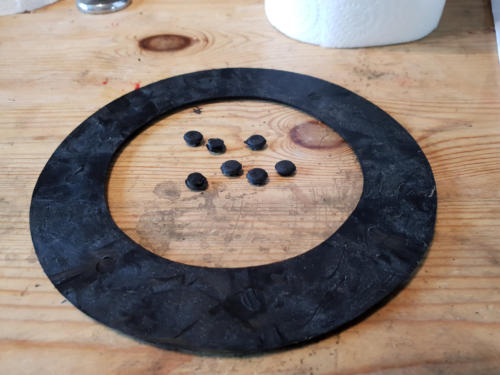
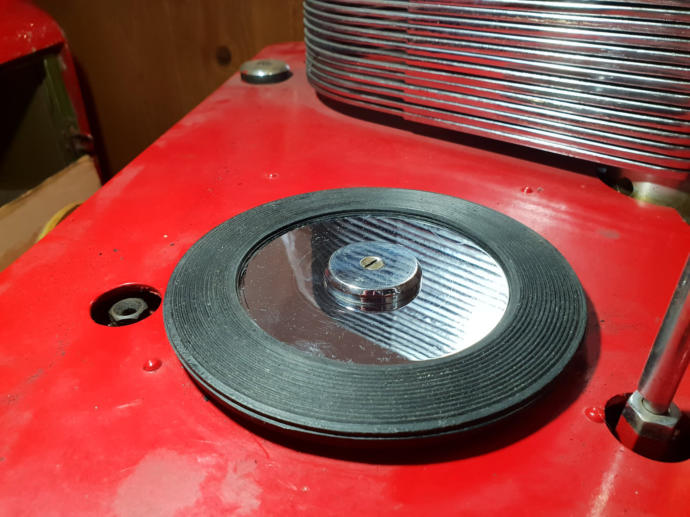
Photo Ref: DB308 Courtesy of Karl Dawson.
Photo Ref: DB309 Courtesy of Karl Dawson.
Photo Ref: DB310 Courtesy of Karl Dawson.
Photo Ref: DB311 Courtesy of Karl Dawson.
Photo Ref: DB312 Courtesy of Karl Dawson.
The Record Stack
The
record
stack
had
become
stiff
over
time
due
to
the
oil
and
grease
solidifying,
so
i
decided
to
strip
down
the
stack
and
clean
and
polish
each
tray,
the
grease
was
difficult
to
remove
but
underneath
the
chrome
was
still
top
quality
so
only
metal
polish
was
used
to
bring
back
the
shine
on
each
stack,
on
reassembly
i
used
a
few
drops
of
3in1
oil
between
each
washer
and tray and also in the spring linkage. the trays were exceptionally free moving after this.
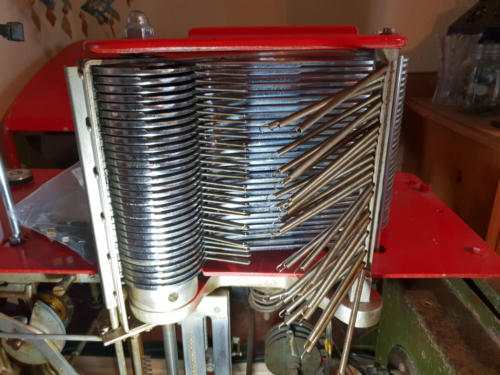
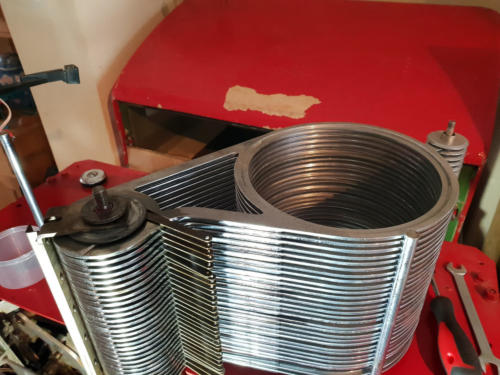
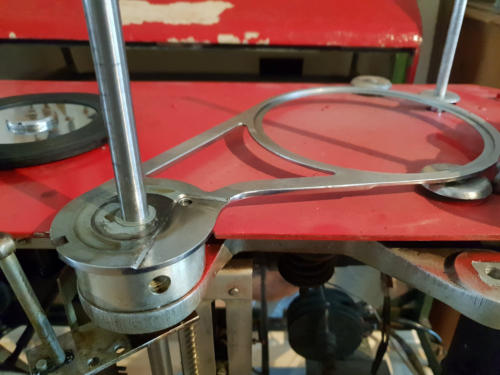
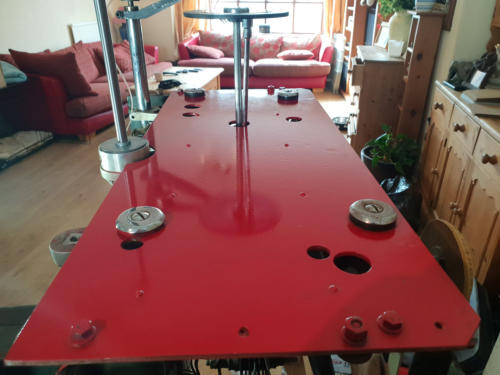
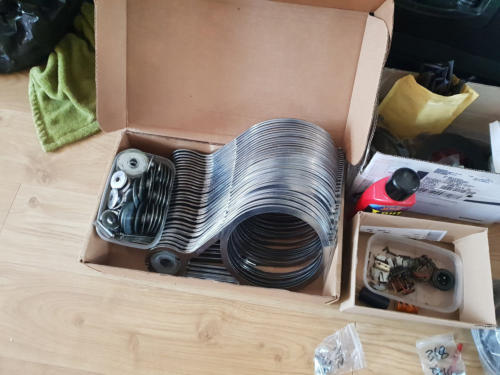
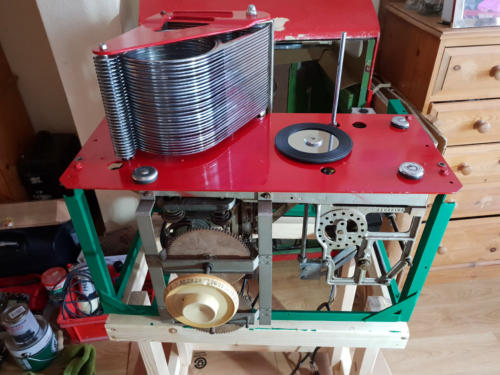
Photo Ref: DB313 Courtesy of Karl Dawson.
Photo Ref: DB314 Courtesy of Karl Dawson.
Photo Ref: DB318 Courtesy of Karl Dawson.
Photo Ref: DB319 Courtesy of Karl Dawson.
Photo Ref: DB320 Courtesy of Karl Dawson.
Photo Ref: DB321 Courtesy of Karl Dawson.
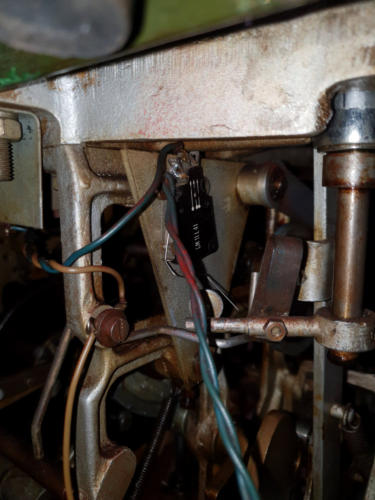
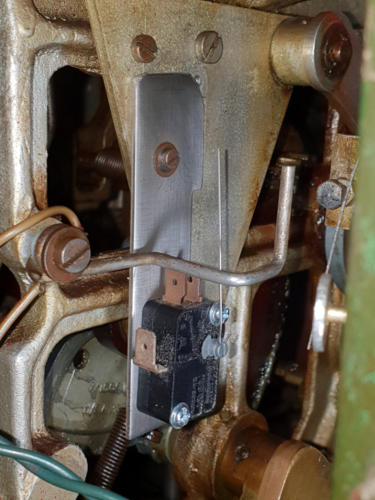
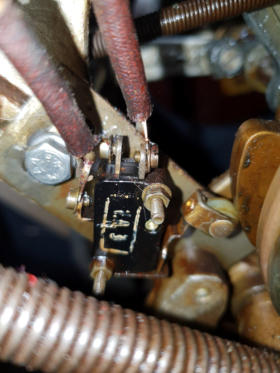
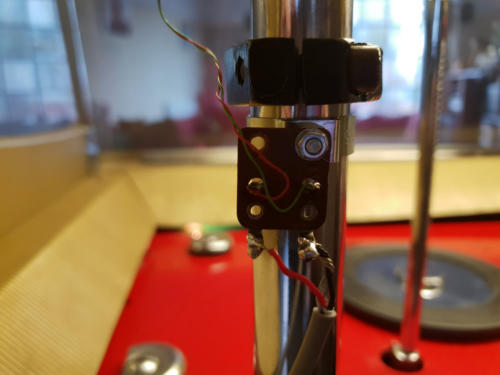
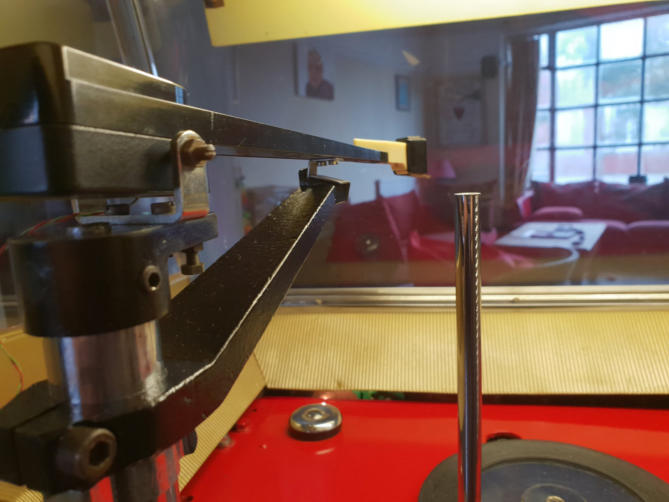
Switches
The
end
of
record
trip
switch
and
the
cam
cycle
start
switch
was
in
bad
condition,
so
replaced
the
trip
switch
with
a
new
sensitive micro-switch, these switches are used in coin slots so take very little tracking pressure to activate the contacts.
and the cycle start switch was replaced with a heavy duty micro switch
Old
New
Photo Ref: DB322 Courtesy of Karl Dawson.
Photo Ref: DB323 Courtesy of Karl Dawson.

Old
New
Photo Ref: DB325 Courtesy of Karl Dawson.
Photo Ref: DB326 Courtesy of Karl Dawson.
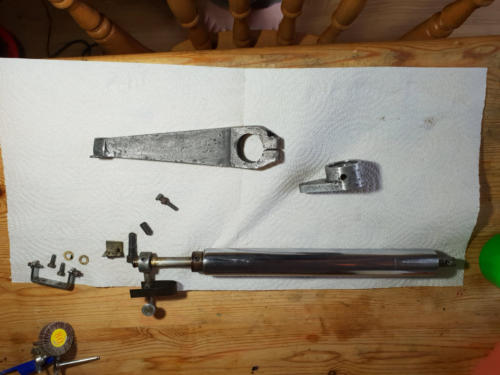
The Tonearm
The
Tonearm
trip
assembly
was
stripped
down
the
solidified
grease
was
removed
and
the
bearings
made
free,
and
some
light
oil
was
applied,
the
supports
and
mount
were
cleaned
and
re-painted
black.
a
tag
strip
was
added
to
the
support
using
a
spring clip to allow for easy servicing. and the unit reassembled and tested with the start and trip positions on the record.
Photo Ref: DB327 Courtesy of Karl Dawson.
Photo Ref: DB340 Courtesy of Karl Dawson.
Photo Ref: DB341 Courtesy of Karl Dawson.
The Final Test
Before
putting
the
Mech
back
into
the
cabinet,
i
decided
to
first
test
the
mech
on
the
trolley,
connecting
everything
together.
it
also allowed me to set up the record start and end trip positions easily.
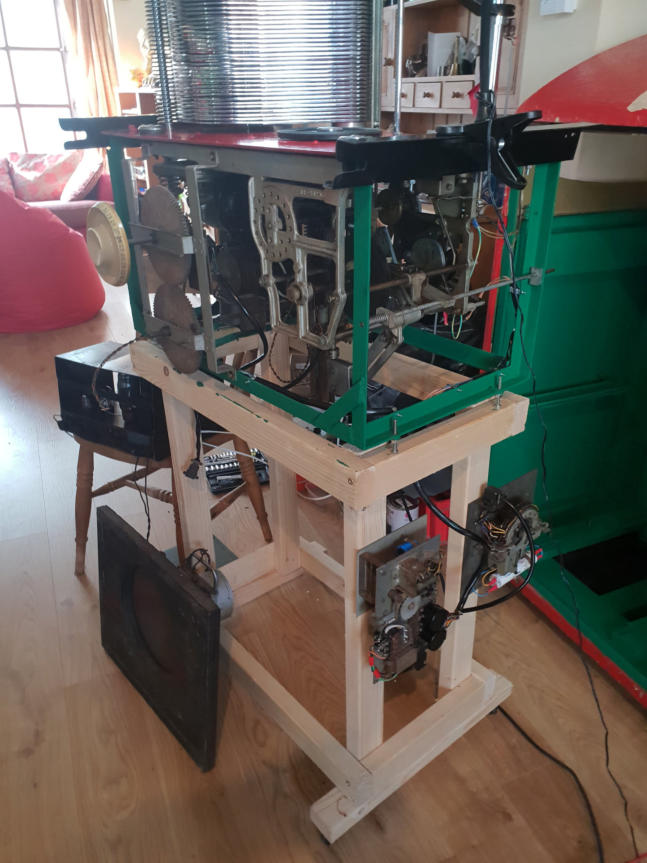
Photo Ref: DB333 Courtesy of Karl Dawson.
The Videos
Thank you for watching, there’s another restoration starting soon.